Introduction
XAMPP is a free and open-source software application bundle. Each letter in "XAMPP" describes the main applications that are included in the package:
- X stands for cross-platform.
- A – Apache HTTP Server
- M – MySQL
- P – PHP
- P – Perl
The software bundle is designed to make it really easy to roll your own web application. This post will detail installation and testing under my development environment.
Downloading
XAMPP can be downloaded from this link. There are several versions available; depending on which platform you need it for. My development machine is running Mac OS X, so I downloaded the universal binary.
Installation
Installation was simple; all that was required was opening the downloaded DMG file, and dragging the XAMPP folder into the Applications folder on OS X.
Testing
The next step was to test that XAMPP was installed correctly. Several elements of the installation were tested. Note: to enlarge any screenshots, simply click on them.
Control panel
The control panel works as expected. There are toggle buttons to turn on/off the Apache, MySQL, and FTP services.
Check that the http and https services work
The HTTP service works as expected: connecting to either http://localhost/ or http://127.0.0.1/ loads the default XAMPP page.
However, the HTTPS service doesn't work out of the box. To enable it, I need a security certificate. I can obtain one from a certificate authority, or create my own.
Ftp service
The FTP service appears to be buggy in the Mac OS X version of XAMPP.
Get an XAMPP security report
I changed the default password for the FTP service in a (vain) attempt to get it to work. All the other security reports are standard.
Get a phpinfo report
Note: the details of the PHP info report are obscured for security reasons.
Get a visitor report
Note: the computer name is obscured for security reasons.
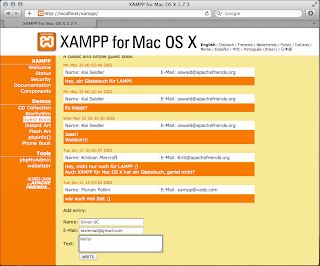
Test the default guestbook
The default guestbook has a form at the bottom of the page. This was filled in like so:
After clicking the "WRITE" button, the guestbook was populated with my new test entry!
Adding a new page
A new page was created in a sub-directory called "test". The page was called "index.html" (the default page name), and some HTML was added.
Bonus: Testing from a mobile device
I tested this page from a mobile device (an iPad) on the same wireless network. As expected, it worked flawlessly.


No comments:
Post a Comment